Register FREE
SCORE:
Reset Puzzle
Cloud Save
Print version
Actions:

SlitherLink leaderboard

All-time leaderboard
Rank
Player
Total score
1
dewi2
142
Monthly leaderboard
Rank
Player
Total score

How to play

Slitherlink puzzle solution
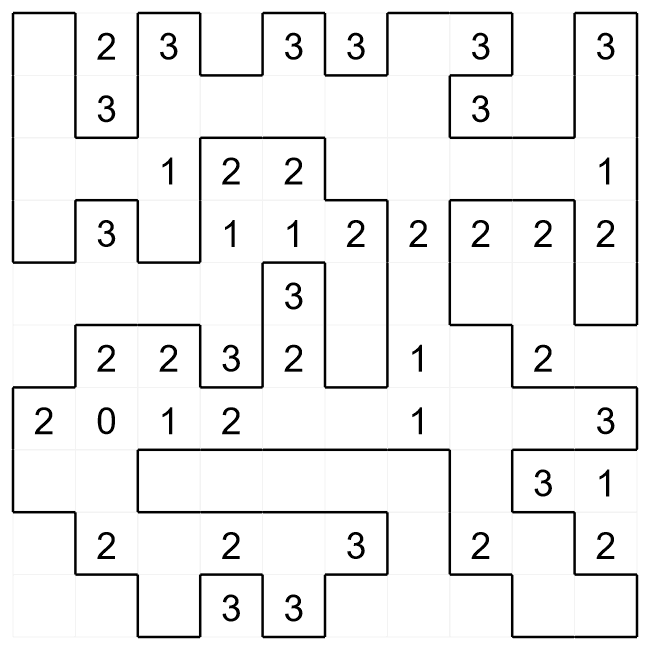
This is an example of a completed Slitherlink puzzle. A Slitherlink puzzle is a grid, and some of the cells will contain number clues. The aim of the puzzle is draw a single loop around the grid so that all the clues are satisfied. The clues tell you how many of its four sides are part of the loop.
Slitherlink puzzle
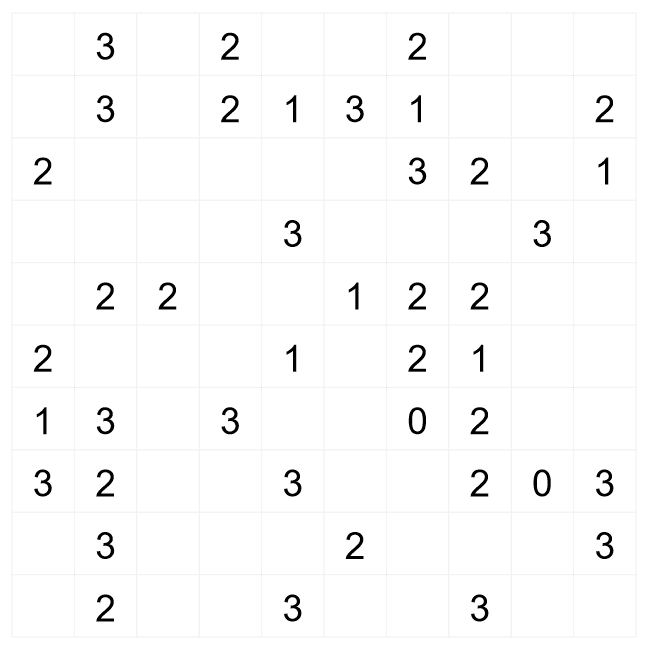
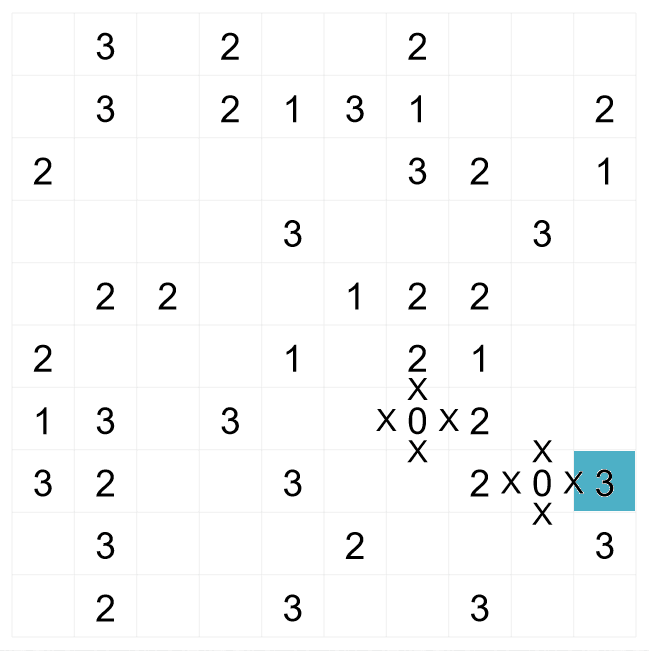
This is a Slitherlink starting grid. The most obvious place to start any Slitherlink puzzle is with the '0' clues. You know that none of these sides form part of the loop, so you can put a 'x' on these links.
Slitherlink puzzle
This first initial step will give you other obvious clues. Take the highlighted '3' clue as an example. One of the sides of this clue can't be part of the loop - the side with a 'x', so that must mean that the other 3 sides are a wall. We can fill this in.
Slitherlink puzzle
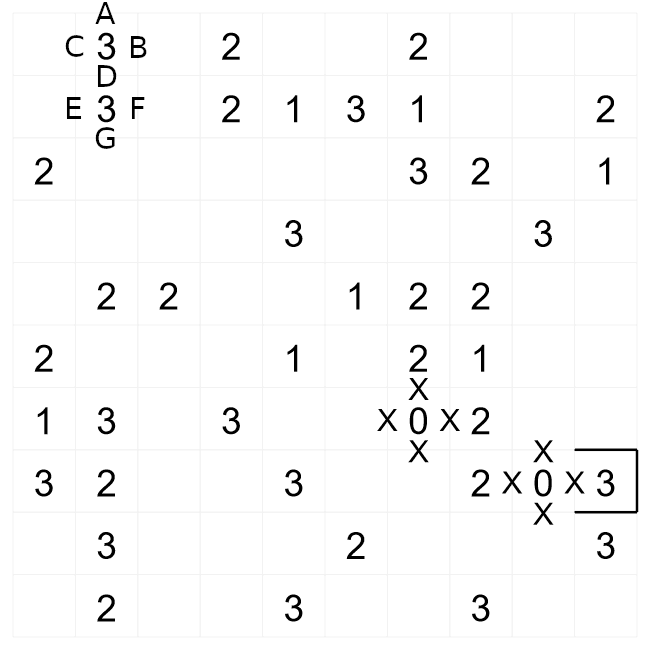
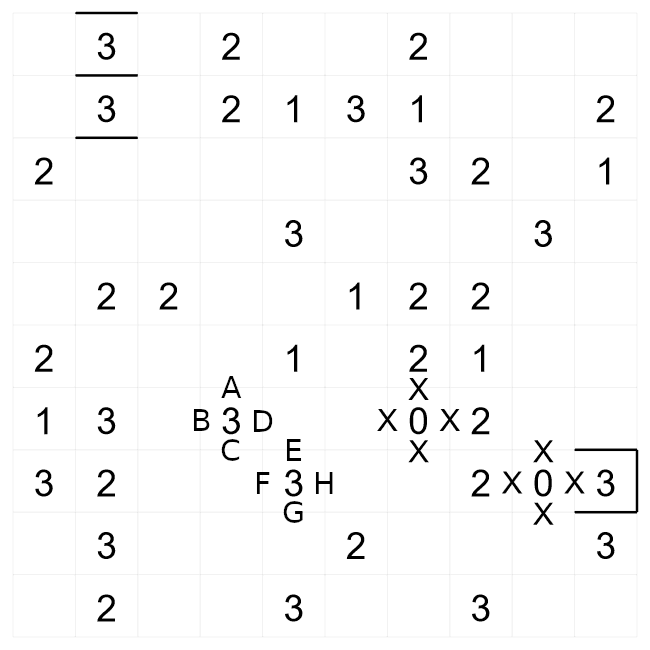
The next place to look is for a group of '3' clues. We have two adjacent '3' clues in the top left corner of this puzzle. There are only two possible ways these two clues can be satisfied. The loop can either go ABDEG, or it can go ACDFG, there are no other ways for both clues to be satisfied. Both possibilities have A, D and G as walls, so we can fill these lines in.
Slitherlink puzzle
There is another block of '3' clues in the middle of this puzzle. There are a limited set of possibilities for this type of diagonally connected '3' clues as well. The top-left cell has the possibility BAD or ABC. If both C and D were walls, then it would mean that E and F couldn't be walls, which means that there aren't enough surrounding sides to satisfy the '3' clue. Both of these combinations have A and B as walls, which means we can fill those in.
We can apply the same rules to EFGH cell, and conclude that G and H must be lines. There are other sets of diagonal '3' clues in this puzzle, and we can apply the same line of reasoning to all of them.
Slitherlink puzzle
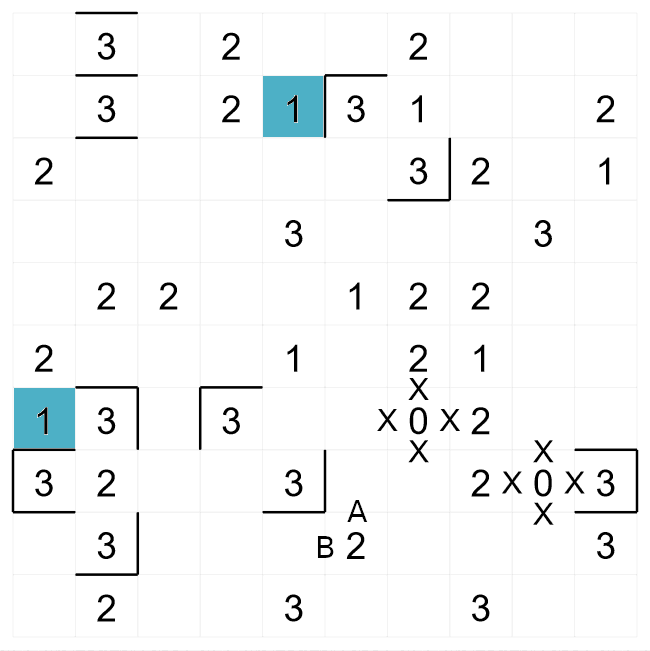
It can be equally useful to think about where we can't put walls. Look at 'A' and 'B' at this point. Neither of these can be walls since the loop of walls around the puzzle can't intersect, or touch at any point. This means we can insert a 'x' in these places across the whole puzzle.
Also, the highlighted '1' clues already have their one wall, so we can put a 'x' in for all the other sides for these clues.
Slitherlink puzzle
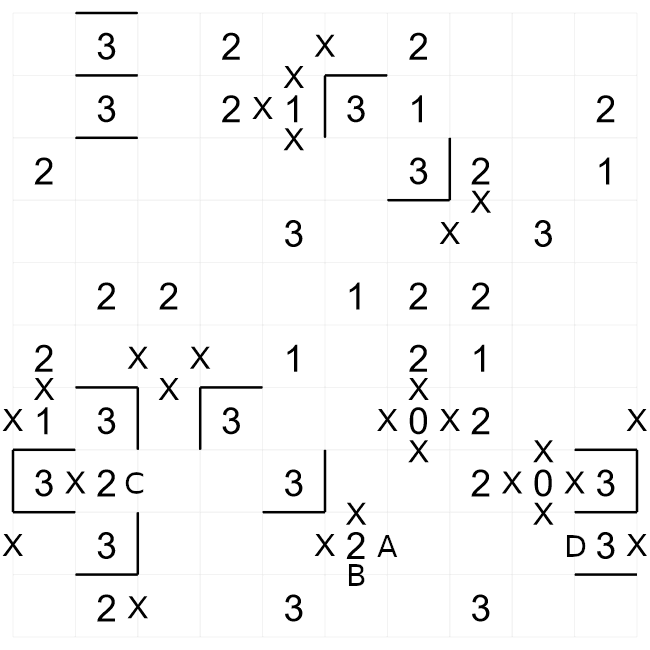
We have now arrived at this situation and can fill in more lines. 'A' and 'B must be walls to satisfy the '2' clue. 'D' must be a wall to satisfy the '3' clue.
'C' is a little more subtle. If 'C' was a wall, then the only way the other '3' clues in this area could be satisfied is to join this section in it's own small closed loop. This is against the rules of the puzzle, so 'C' can't be a wall, and we should mark it with a 'x'. The '2' clue means that the top and bottom sides must be walls.
Slitherlink puzzle
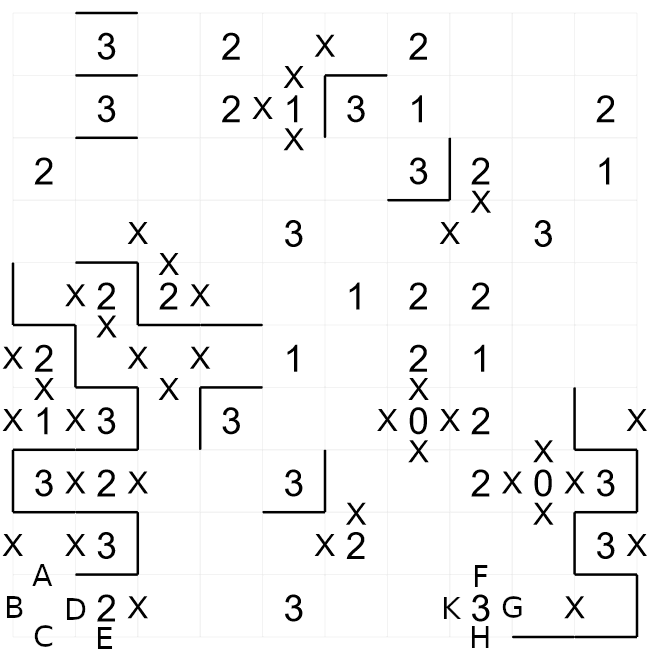
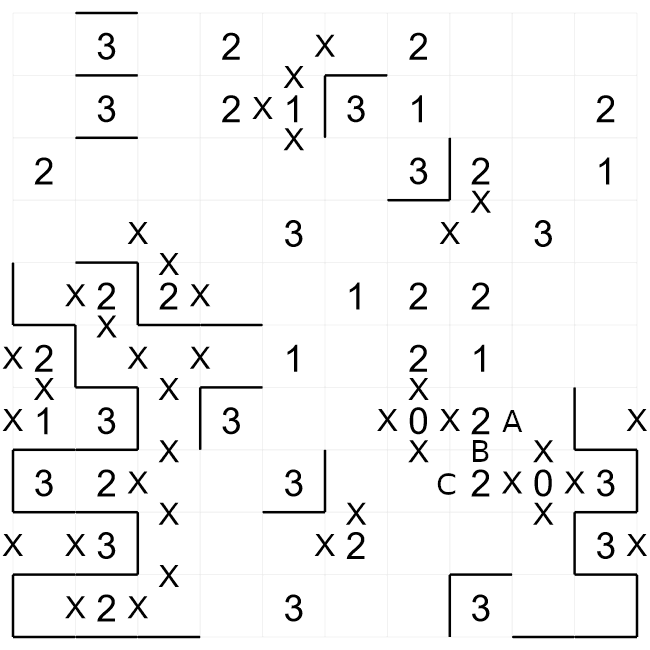
We have now made more progress on this puzzle by continuing to apply the same logic of where walls can go, and where they can't go. Now consider the area in the bottom-left of this puzzle. The wall must exit this area in this way. There are two possibilities, it can either exit via ABCE, or go directly with DE. If it follows DE, then the '2' clue will have three surrounding walls, so that can't be possibility, so the wall must follow the ABCE path.
The '3' clue towards the bottom-right has the wall approaching from the right. There are only two ways the wall can satisfy the '3' clue from here, either HKF, or GFK. Both of the possibilities have F and K as walls, so we can fill these in.
Slitherlink puzzle
We have now arrived at this position. There is only way for the pair of '2' clues to be satisfied here, and that is if the wall loop follows the path ABC between them.
You now have all the techniques you need to solve Slitherlink puzzles!

Try our other puzzles!

Sudoku


Sudoku

Jigsaw Sudoku

Kids Sudoku

12×12 Giant Sudoku

16×16 Giant Sudoku

Hyper Sudoku

X-Sudoku

Greater Than Sudoku

Killer Sudoku

Center-Dot Sudoku

Odd-Even Sudoku

Arrow Sudoku

Consecutive Sudoku

SudokuXV

Kropki Sudoku

Samurai Sudoku

Thermo Sudoku

Renban Sudoku

Entropy Sudoku

Anti Knight Sudoku

Palindrome Line Sudoku

Consecutive Line Sudoku

RegionSum Line Sudoku

Between Line Sudoku

Vudoku

Quadruple Sudoku

Sandwich Sudoku

Argyle Sudoku

German Whisper Line Sudoku

Rossini Sudoku

Frame Sudoku

Lockout Line Sudoku

Entropic Line Sudoku

Little Killer Sudoku

Factor Line Sudoku

Skyscraper Sudoku

Addition Sudoku

Anti King Sudoku


Logic Puzzles


Nonograms

Picross

Nurikabe

Mathdoku

Hitori

Futoshiki

Towers

Maze

Network

Minesweeper

Hashi

SlitherLink

TicTacToe

CellBlocks

Suguru

Kakuro

Train Tracks

Battleships

Masyu

Light Up

Shakashaka

Fillomino

Numberlink

Suko

SetSquare

Dominosa

Spiral Galaxy

Hidoku

Star Battle

Kakurasu

Ballsort

HexaBlocks

SquareBlocks

TriangleBlocks

OneStroke

PipeConnect

PipeTurn

NumberMaze

MathGrid

Slant

Lits

Tents

Range

Shingoki

Tapa

NoriNori

Yajilin

Wordsearch

Card games


Solitare

2 player games


Pairs

Four in a row